Custom Streetwear, Casualwear & Denim Manufacturer•MOQ 50 pcs•Denim MOQ 100 pcs•7-Day Sample Available

Cargo Pants Tech Pack: What Streetwear Brands Should Specify Before Sampling
Build a cargo pants tech pack that factories can sample from: pocket construction, fit points of measure, fabric, trims, hardware and common mistakes.

By StitchQuote Production Team
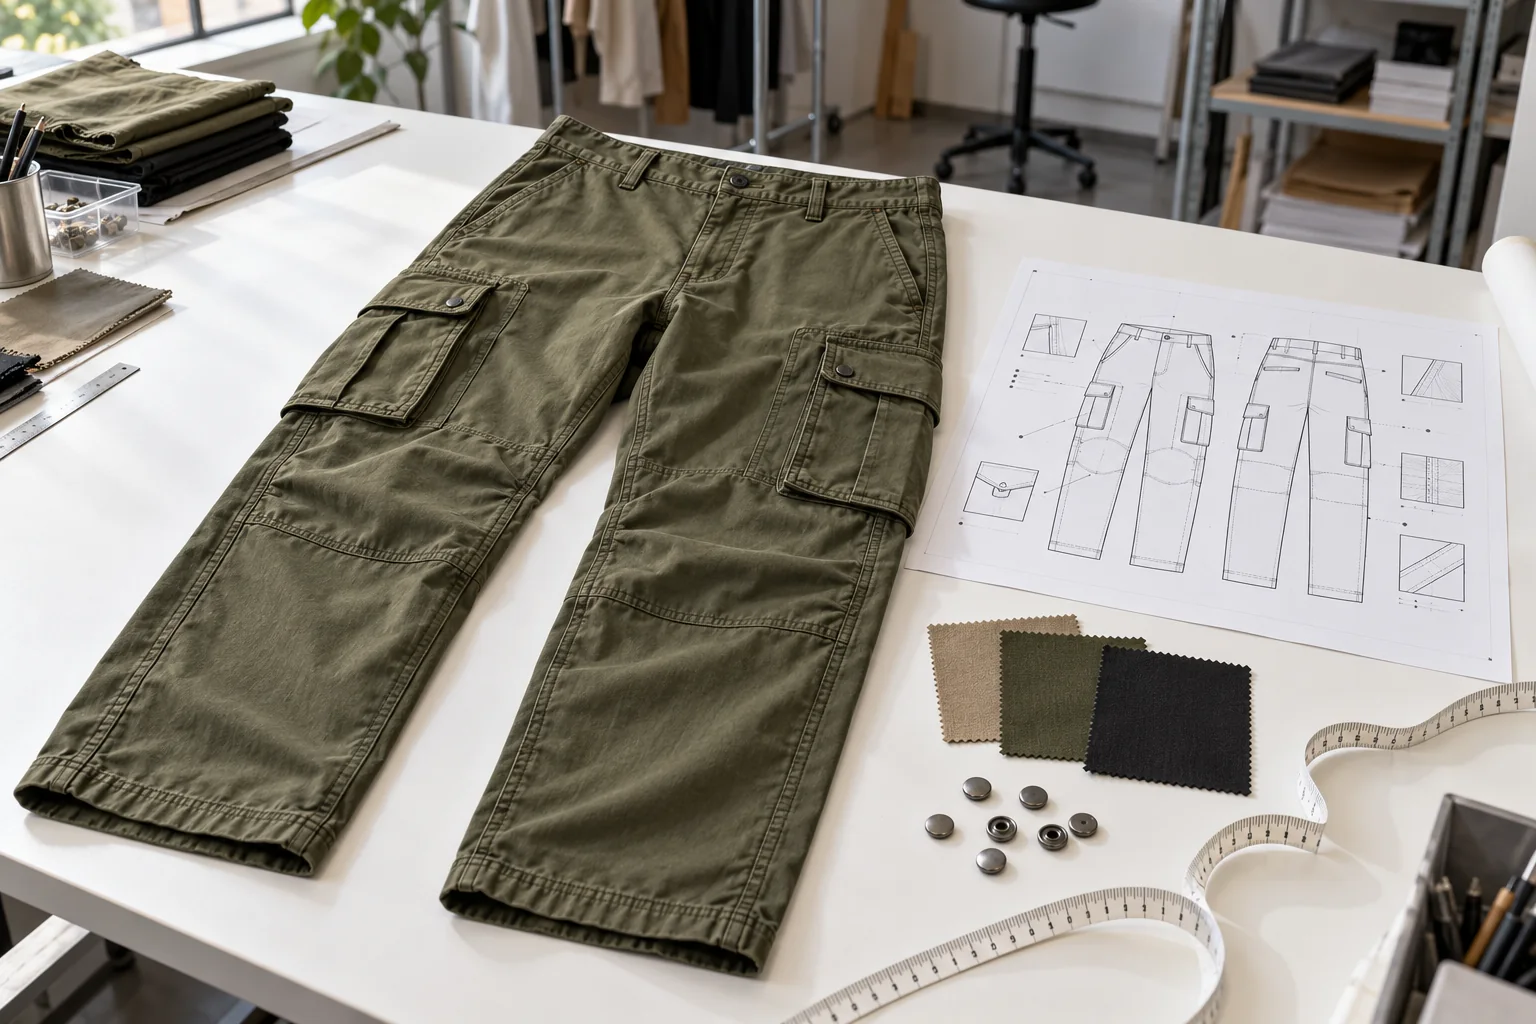
A cargo pants tech pack needs to explain more than the overall silhouette. Compared with tees or basic joggers, cargos introduce pocket volume, flaps, hardware, knee shaping, and overlapping fabric layers. Each detail can change how the garment hangs, feels, and moves. For streetwear founders, the goal is to turn a visual idea into instructions that a pattern maker, sample machinist, and quality inspector can interpret consistently.
Before sampling, separate confirmed decisions from open questions. If a pocket shape, fabric, or closure still needs development, flag it instead of letting a reference photo become an accidental production instruction.
What a cargo pants tech pack should include
Your pack should connect design intent with measurable specifications. Include these essentials, even if some details remain provisional:
- Style identification: style code, revision date, sample size, and intended size range.
- Technical flats: front, back, side, and enlarged detail views.
- Measurement specifications: points of measure, measurement methods, and agreed tolerances.
- Materials and trims: shell fabric, pocketing, reinforcement, closures, labels, and thread.
- Construction instructions: seams, stitching, reinforcement, waistband, and hem treatment.
- Finishing requirements: washing, dyeing, pressing, and branding placement.
Our guide to tech packs for low-MOQ cut-and-sew production explains how these documents support development. Keep every page tied to the same revision so the factory does not combine outdated sketches with updated measurements.
Flat sketches and pocket construction
Bellows versus flat patch pockets
Show whether each pocket lies flat or expands through pleats, gussets, or folded sides. For bellows pockets, identify which edges expand and where folds are secured. Specify finished pocket dimensions, usable opening, and expansion depth. A large outline alone does not explain capacity. Cargo pocket construction should also identify lining, reinforcement, and any stitching that closes part of the opening.
Flaps, closures, and hardware
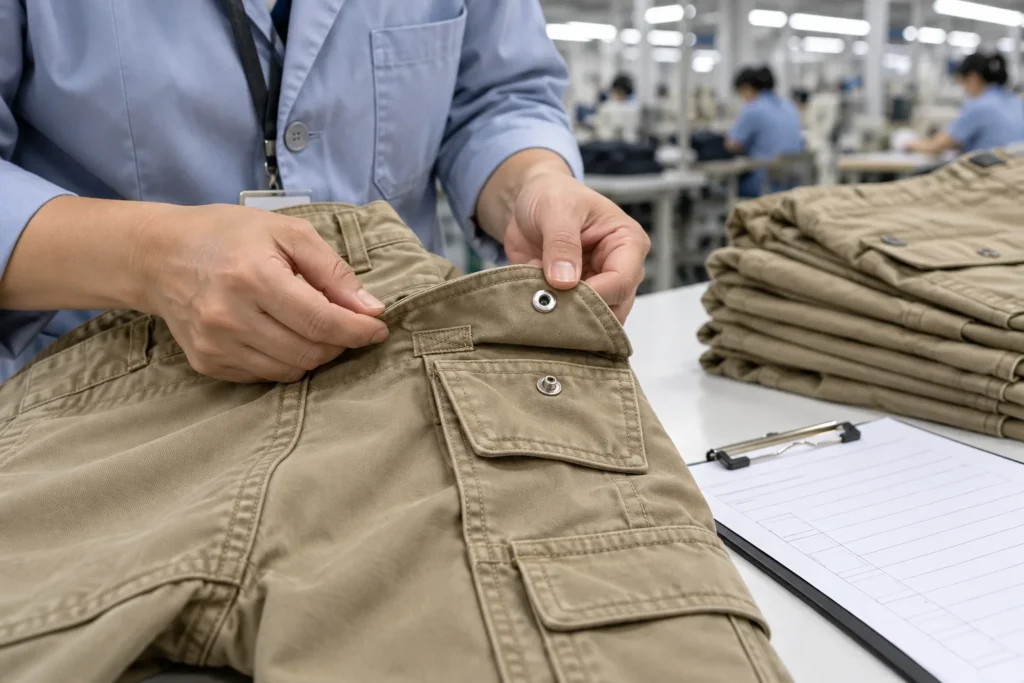
Draw flaps both closed and open when necessary. Define their shape, overlap, interfacing, and closure position. State whether snaps are concealed or visible, and whether a zipper needs a cover or backing. Record hardware size, finish, and attachment method in the materials list. Check that the wearer can operate closures without fighting a stiff flap or reaching into a narrow opening.
Pocket placement relative to the side seam and knee
Locate pockets from repeatable reference points, such as the waistband seam and side seam. Clarify whether a pocket crosses the side seam or sits entirely on one panel. Check its lower edge against the knee shaping and intended bend line. Front views alone can hide awkward placement, so include a side view and assess the pocket with the garment worn.
Fit and measurement spec
Key points of measure for cargo pants
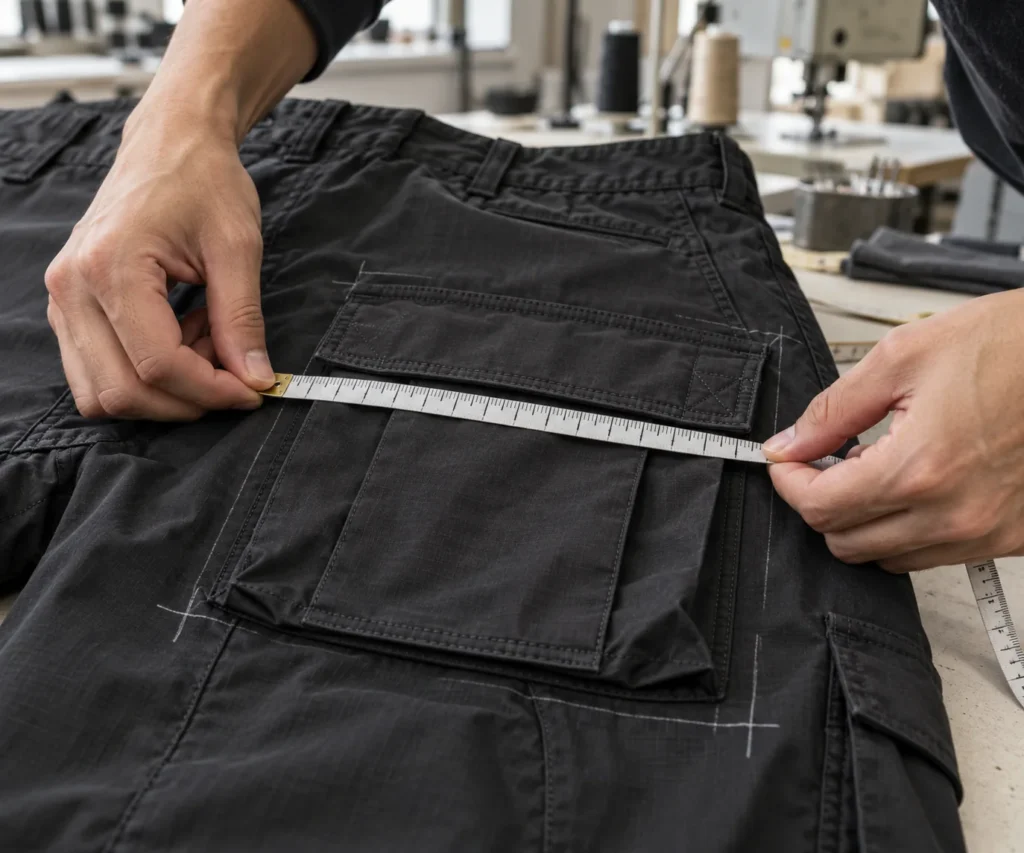
Specify waist, front and back rise, thigh, knee, leg opening, and inseam. Add hip, waistband height, and pocket position where relevant. Every measurement needs a method: identify whether the waistband is relaxed or stretched, where the thigh is measured, and how the knee position is located. State whether measurements apply before or after the intended wash.
| Measurement area | What to define |
|---|---|
| Waist and rise | Waistband condition, measuring endpoints, and whether waistband height is included. |
| Thigh and knee | Distance from a named reference point and how the garment is laid flat. |
| Leg opening and inseam | Hem condition, adjustment setting, and seam path. |
| Pocket position | Reference seam, measured pocket edge, and vertical and horizontal offsets. |
Agree tolerances by measurement and construction rather than applying one allowance everywhere. Our explanation of garment measurement tolerances for small-batch orders can help structure that discussion.
Describing straight, baggy, and tapered utility silhouettes
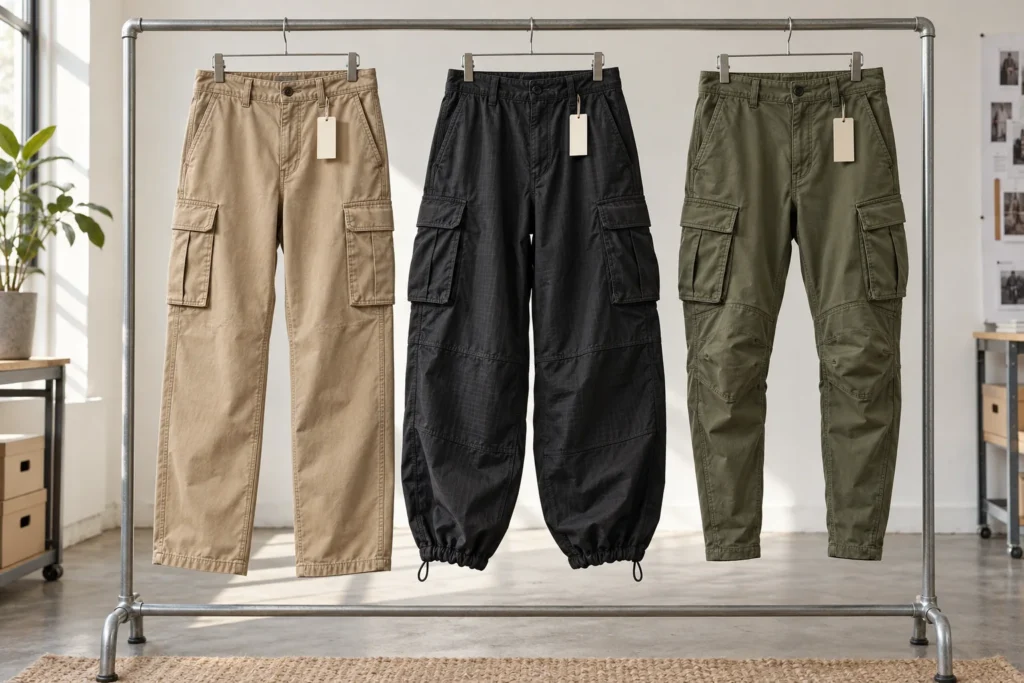
“Baggy” is a direction, not a specification. Translate it into room through the seat and thigh, rise depth, knee width, and hem width. A straight leg and a tapered utility leg can share a thigh measurement but look different below the knee. Include fit references with notes identifying what to follow, and review the sample on a wearer whose measurements are recorded.
Fabric, trims, and bill of materials
Choose fabric around the desired drape and function. Twill can support structured shapes; ripstop brings a visible grid; nylon can create a lighter, technical appearance; denim suits a heavier cargo-jean direction. These names alone are insufficient. Specify composition, weight, weave, stretch requirements, color reference, and finish, supported by an approved swatch when available.
Wash and garment dye can affect shrinkage, shade, hand feel, and seam appearance. Define the intended finishing process before finalizing fit. Ask how shell fabric, pocketing, thread, and trims will behave together through that process.
The bill of materials should identify zippers, snaps, cord locks, webbing, labels, pocket bags, and reinforcement materials by location and quantity. Specify zipper length and function, including whether it is separating or closed-end. Review zipper quality considerations for pants production before approving substitutions that could affect operation or appearance.
Construction details factories need
Define seam types and visible stitching separately. Identify where you want topstitching, its distance from the edge, and any contrasting thread. Mark bar tacks or other reinforcement at stress points, including pocket openings and belt-loop attachments, while checking that reinforcement does not obstruct pocket access.
Specify a fixed, elastic, drawcord, or combination waistband. Show elastic coverage, drawcord routing, exit holes, and belt-loop placement. At the hem, distinguish an open finish from an elastic cuff or adjustable drawcord. For toggles, show cord anchoring and how excess cord is managed.
Internal construction matters too. Pocket bags need clear dimensions, orientation, and attachment points so they remain comfortable and do not pull across the leg. Our guide to preventing pocket bag twisting in woven pants covers an issue worth checking during sample review.
Branding and labels
Provide artwork, finished dimensions, application method, and color references. Locate branding from a specific pocket edge or seam rather than “on the thigh.” Confirm whether embroidery or patches must be applied before pocket assembly to avoid stitching through a functional pocket. Include main, size, and care label locations, and confirm required label content for your selling markets.
Common cargo pants tech pack mistakes
- Using photos without annotations: identify which details belong to your design.
- Leaving pocket depth undefined: distinguish visual size from usable storage.
- Specifying only the sample size: explain how fit and pocket placement should change across sizes.
- Approving hardware by appearance alone: check operation, backing, and interaction with fabric.
- Ignoring finishing: assess fit and appearance after the specified wash or dye process.
- Scattering revisions across messages: consolidate approved changes into the current document.
From tech pack to sample to bulk
Before cutting, ask your custom cargo pants manufacturer to flag missing specifications, material substitutions, and construction conflicts. A clear cargo pants tech pack makes those questions easier to resolve before they become sample corrections.
Review the sample in a consistent sequence:
- Measure the garment using the agreed methods and finishing condition.
- Check standing fit, walking, sitting, and knee movement.
- Load pockets lightly and inspect sagging, access, and flap alignment.
- Operate every closure and adjustment; inspect seams, reinforcement, and branding.
- Record each correction with a photo, location, and specific instruction.
Update the revision date and distinguish approved details from items needing another review. Confirm the final specification and approved sample before bulk production. At StitchQuote, MOQ starts at 50 pieces per style for most styles; denim, including cargo jeans, starts at 100 pieces. See our sampling and MOQ information when planning quantities.
FAQ
Do I need a complete cargo pants tech pack before sampling?
You can begin development discussions with references, but settle essential measurements, materials, pocket construction, and closures before cutting. Clearly mark anything still requiring a proposal.
What is the MOQ for custom cargo pants?
StitchQuote’s MOQ starts at 50 pieces per style for most styles. Denim styles start at 100 pieces. Confirm how your intended fabric and style fit these requirements.
How long does a cargo sample take?
Samples take about 7 days for standard styles. A heavily customized cargo with new hardware or special fabric may take longer; confirm the timeline.
Can cargo jeans use the same specifications?
You can reuse the document structure, but review measurements, seams, reinforcement, trims, and finishing for denim. Do not assume specifications developed for lightweight fabric will transfer unchanged.
What fabric is best for streetwear cargos?
Start with silhouette, season, and intended use. Compare actual swatches for drape, bulk, and hand feel, then verify the choice in a sample with the intended finishing process.
Ready to develop your next pair? Share your tech pack or design references with the StitchQuote Production Team so we can review the details that need clarification before sampling.
Request a manufacturing quote
Share your product type, quantity range, and destination. We usually reply within one business day.